
Changing nameservers in GoDaddy is easy as 1,2,3 by following our guide with a video tutorial.
Follow our guide for a hassle-free experience if you are doing it for the first time or maybe you are not able to get the option for it.
Look no further as we have made this guide for you on How to change name server in GoDaddy to make sure you are doing it in the right way.
You can follow the below video directly to quickly change nameservers in GoDaddy
Steps
1) Login in to your GoDaddy account

2) Now scroll down and search for the option “All Products and Services” and look for your domain name within the Product and Services option and click on “DNS” option. (we are using domaintutorial.xyz)
3) You will be shown with DNS records for your domain name

4) Scroll down and look for the option “Nameservers“. Click on the “Change” button
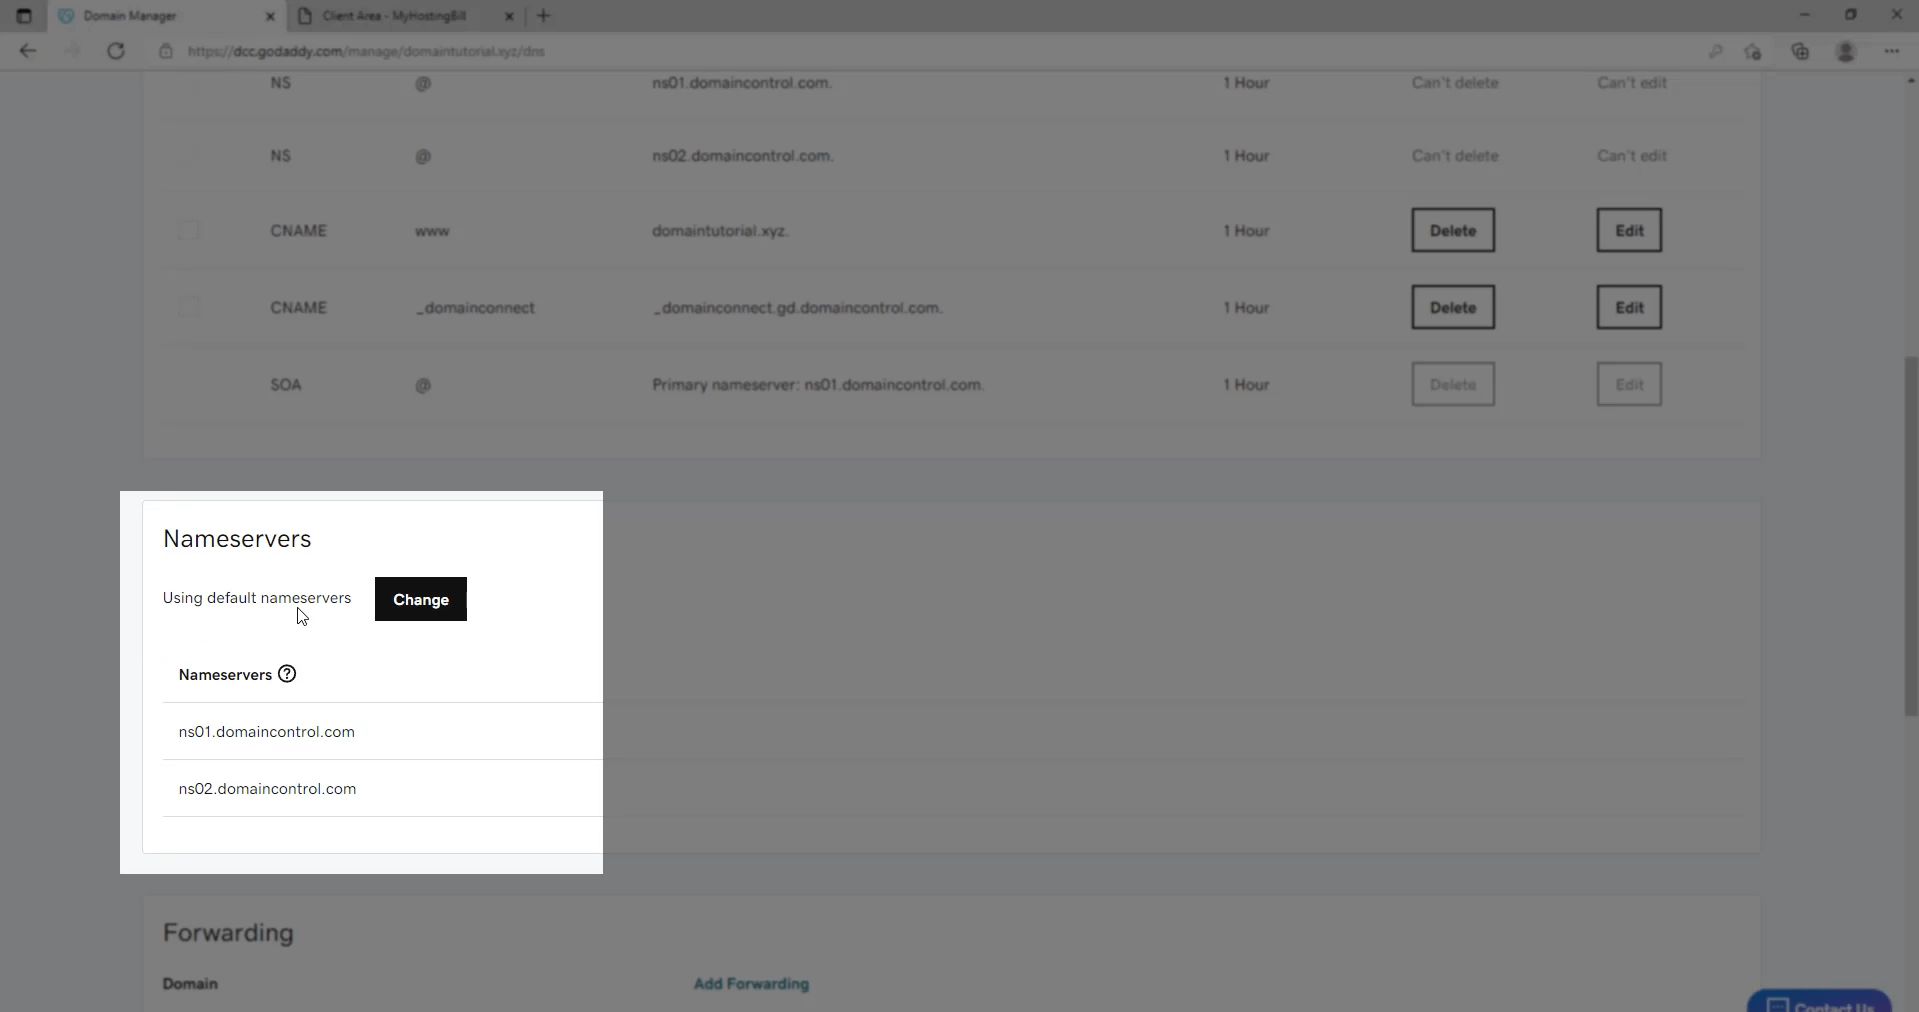
5) A popup will be shown where you can enter your nameservers of hosting
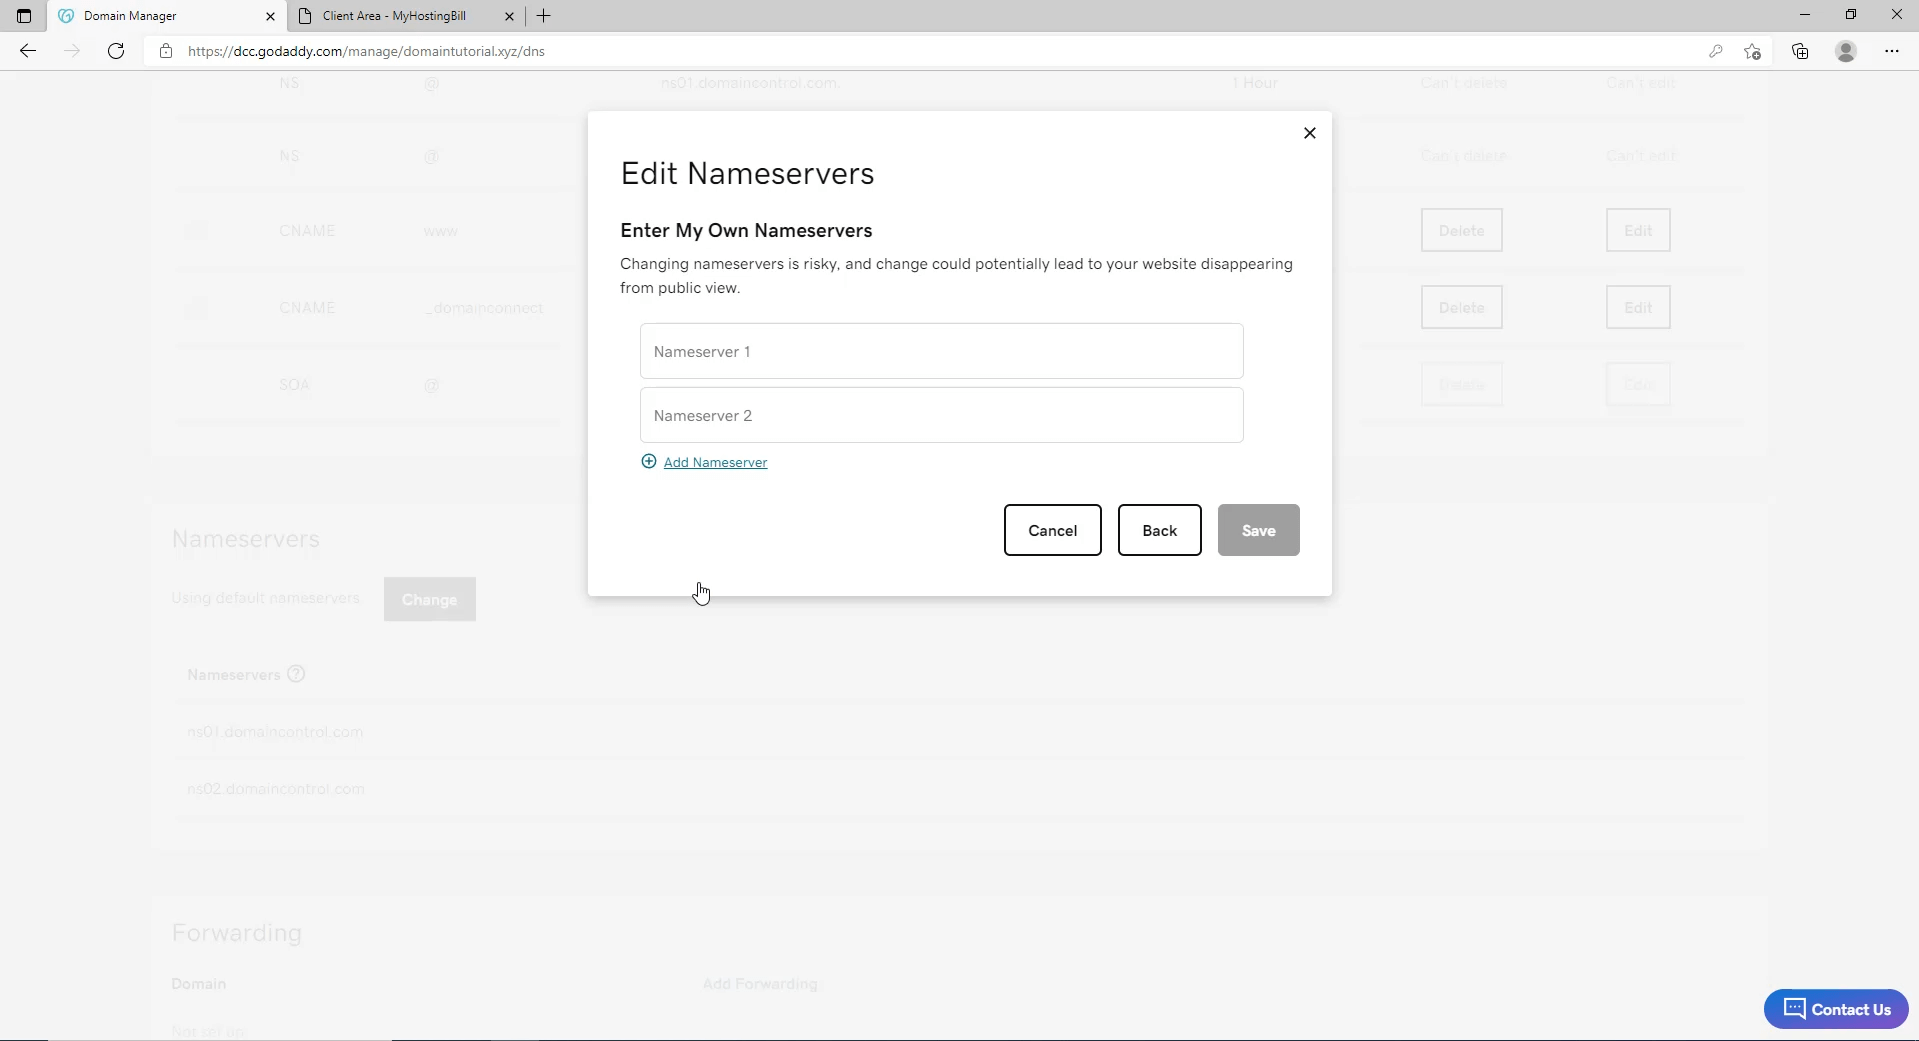
6) Enter your hosting nameservers and click on “Save”

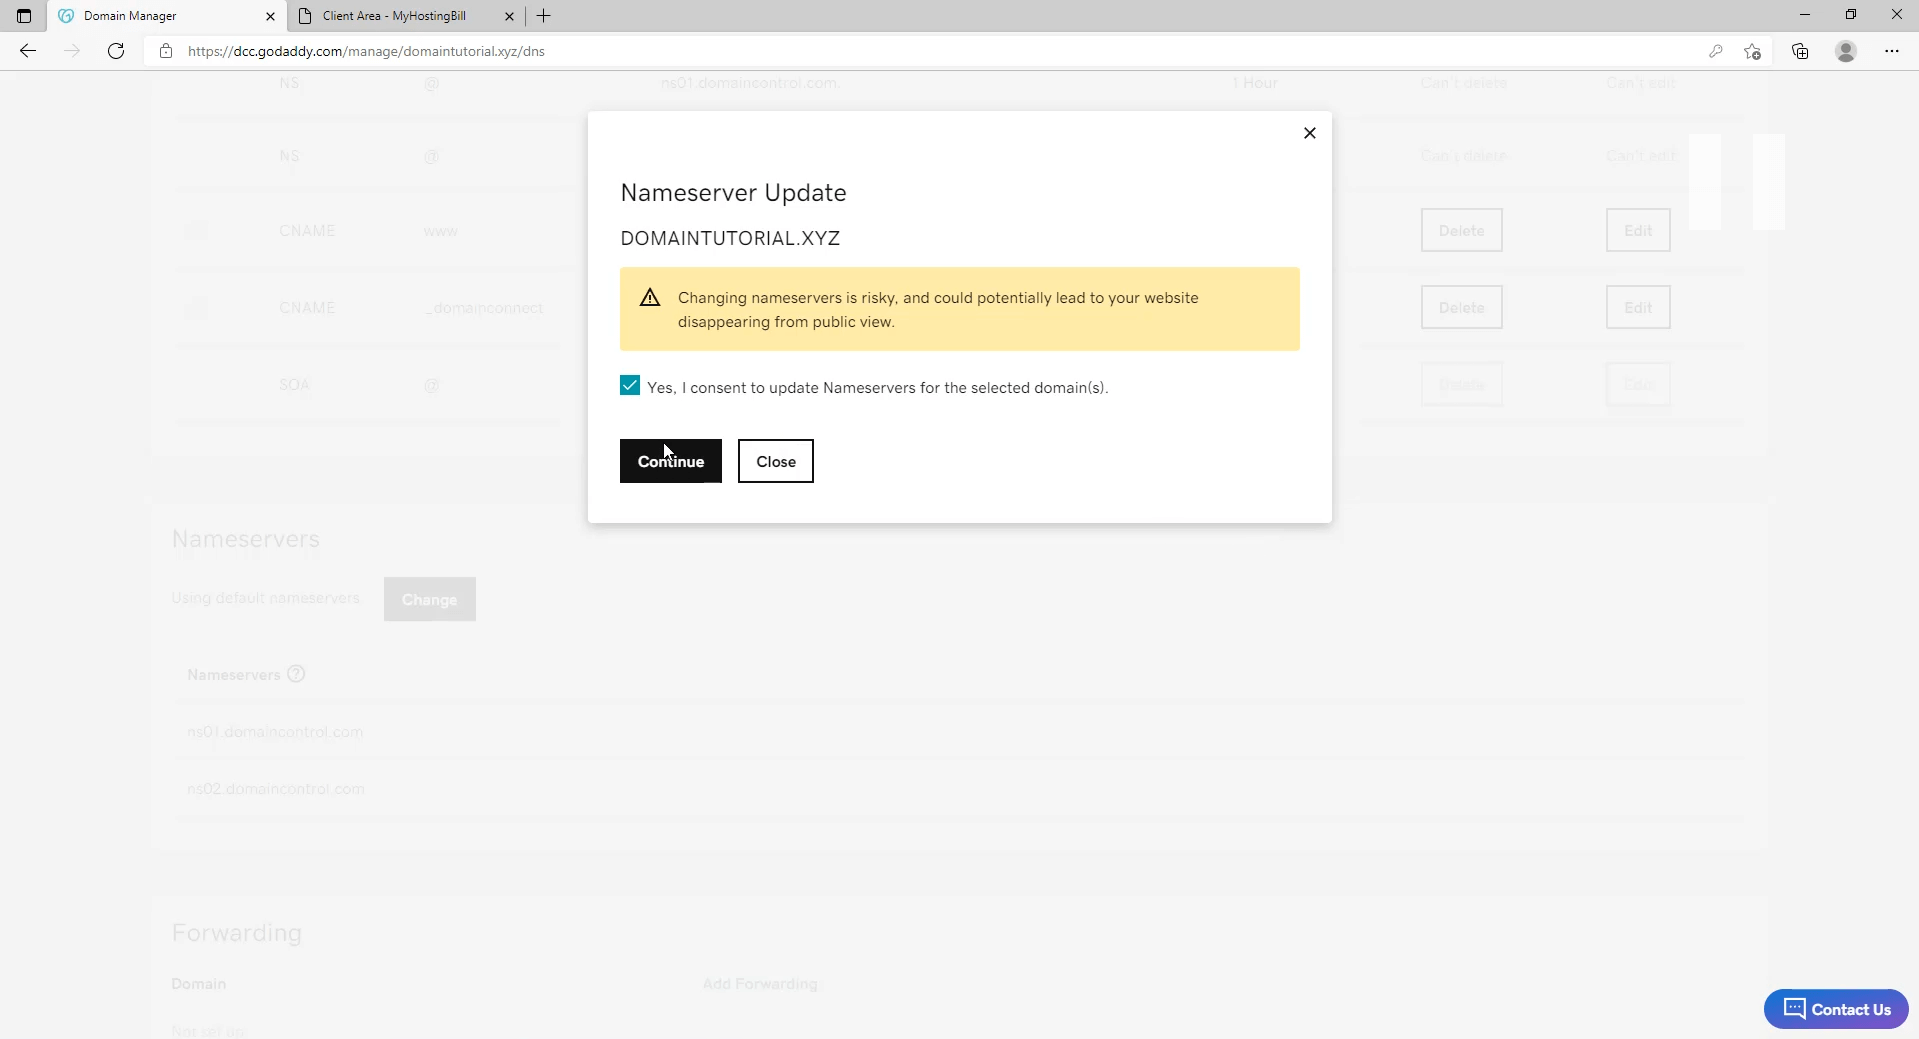
7) You’ll get a warning and it’s just to confirm the Nameserver change. Check the box and click on “Continue”
8) A Success message will be shown on the page which means your changes have been successfully saved.
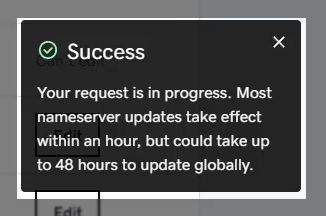
9) Now reload the page after 1-2 mins and you’ll see your new nameservers in the nameservers
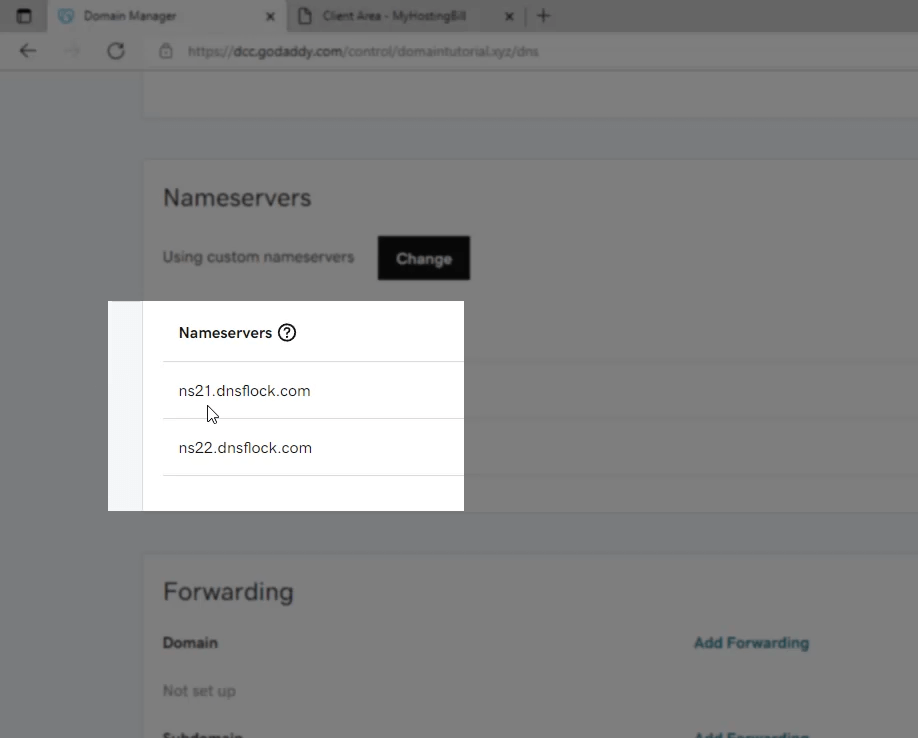
Congratulations. You have successfully changed your nameservers for your domain name in GoDaddy.
If you are facing any issues, let us know in the comments.